- Nhan Tran Blog
- Posts
- Create a reusable and editable blog page using Builder.IO
Create a reusable and editable blog page using Builder.IO
Nhan Tran
March 24, 2024
Coming to Builder.IO after experiencing Webflow (I needed a framework that allows developers to create custom components), I was pretty disappointed with Builder.IO's lack of support for customizable Blog pages with dynamic content.
To illustrate the problems, you can do this in Webflow:
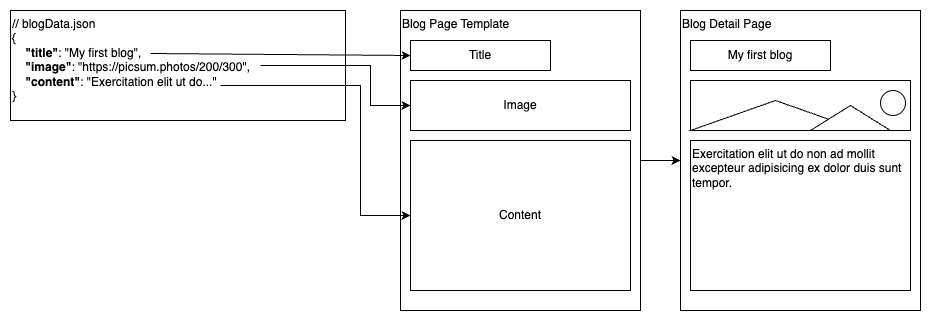
This isn’t supported in Builder.IO, as far as I can tell from looking at their documentation and NextJS Blog examples. The current way Builder.IO is doing this is:

So no customizations are possible without code changes.
I don’t think this is a good authoring experience. So I investigated a little deeper.
That’s when I came across the Custom Data option, which allows you to push the data from NextJS to Builder.IO to be available in the visual editor.
Anyway, there are a few things we need to set up before we can think about passing in the data.
Step 1: Set up blog data
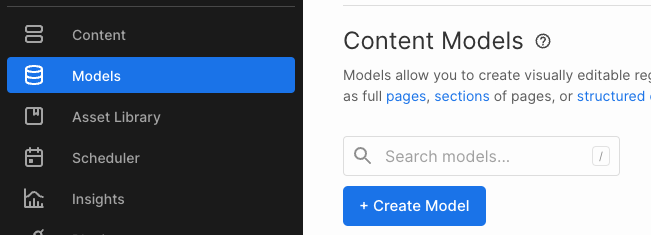
From the Builder.IO app, select Builder → Create Model → Data
Give it a name, let’s call it Blog.
Setup the Fields data. It’s important that Slug have to be presented.
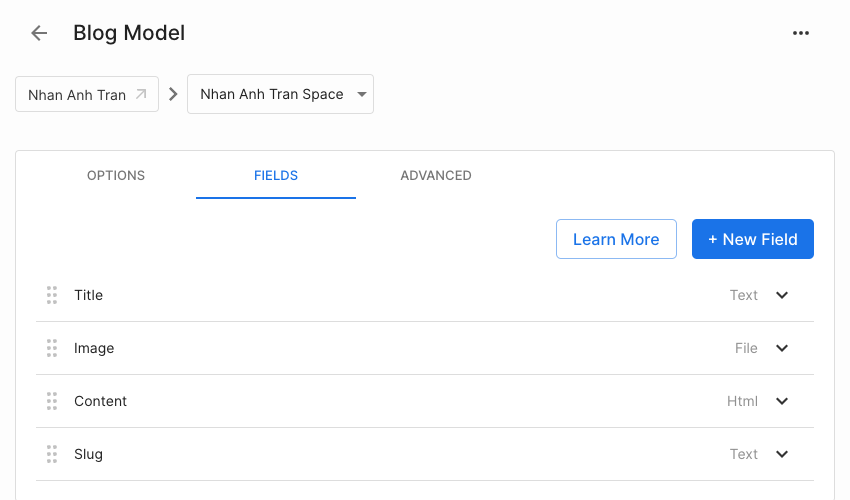
(Optional) Turn on Required for all fields and set up default values to ensure the payload always has enough attributes.
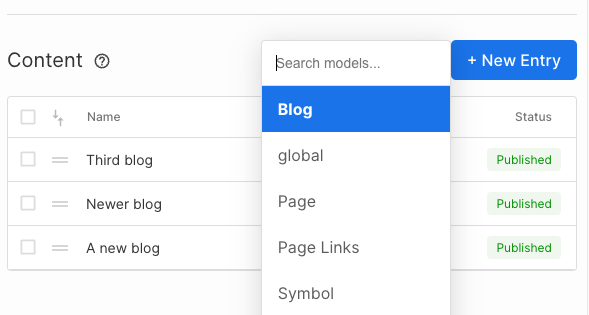
Go back to Content and create a few blogs as sample data. Remember to publish them so that they are available to be queried.
Step 2: Set up the Blog page
On Builder.IO
Create a blog page from the Page model (see the Quickstart guide to learn about how to create & use this model).
In the Targeting option, create a target condition where the current URL Path starts with
/blog
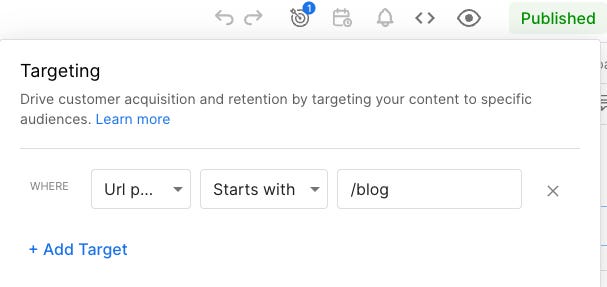
Publish the page
In the NextJS repo
Create a catch-all page for the Blog page.
// blog/[...page]/page.tsx
import { builder } from "@builder.io/sdk";
import { RenderBuilderContent } from "@/components/builder";

// Builder Public API Key set in .env file
builder.init(process.env.NEXT_PUBLIC_BUILDER_API_KEY!);

interface PageProps {
    params: {
        page: string[];
    };
}

export default async function Page(props: PageProps) {
    const builderModelName = "page";
    const content = await builder
        // Get the page content from Builder with the specified options
        .get("blog", {
            userAttributes: {
                // Use the page path specified in the URL to fetch the content
                urlPath: "/",
            },
            query: {
                "data.slug": props?.params?.page?.join('.'),
            }
        })
        .toPromise();

    return (
        <>
            {/* Render the Builder page */}
            <RenderBuilderContent content={content} model={builderModelName} />
        </>
    );
}
Fetch the blog content using builder SDK, passing in the URL path as a query (e.g. in
/blog/my-first-blogwill have the URL pathmy-first-blog).In the RenderBuilderContent component (which is essentially a wrapper around BuilderComponent), pass in the
dataprops.
// builder.tsx
"use client";
import { ComponentProps } from "react";
import { BuilderComponent, useIsPreviewing } from "@builder.io/react";
import { builder } from "@builder.io/sdk";
import DefaultErrorPage from "next/error";
import "../builder-registry";

type BuilderPageProps = ComponentProps<typeof BuilderComponent>;

// Builder Public API Key set in .env file
builder.init(process.env.NEXT_PUBLIC_BUILDER_API_KEY!);

export function RenderBuilderContent({ content, model }: BuilderPageProps) {
  // Call the useIsPreviewing hook to determine if
  // the page is being previewed in Builder
  const isPreviewing = useIsPreviewing();
  // If "content" has a value or the page is being previewed in Builder,
  // render the BuilderComponent with the specified content and model props.
  if (content || isPreviewing) {
    return <BuilderComponent content={content} model={model} options={{includeRefs: true}} data={{data: content?.data}}/>;
  }
  // If the "content" is falsy and the page is
  // not being previewed in Builder, render the
  // DefaultErrorPage with a 404.
  return <DefaultErrorPage statusCode={404 } />;
}
Go back to the Builder.IO app and open the newly created Blog page. You can see that the data is now available.
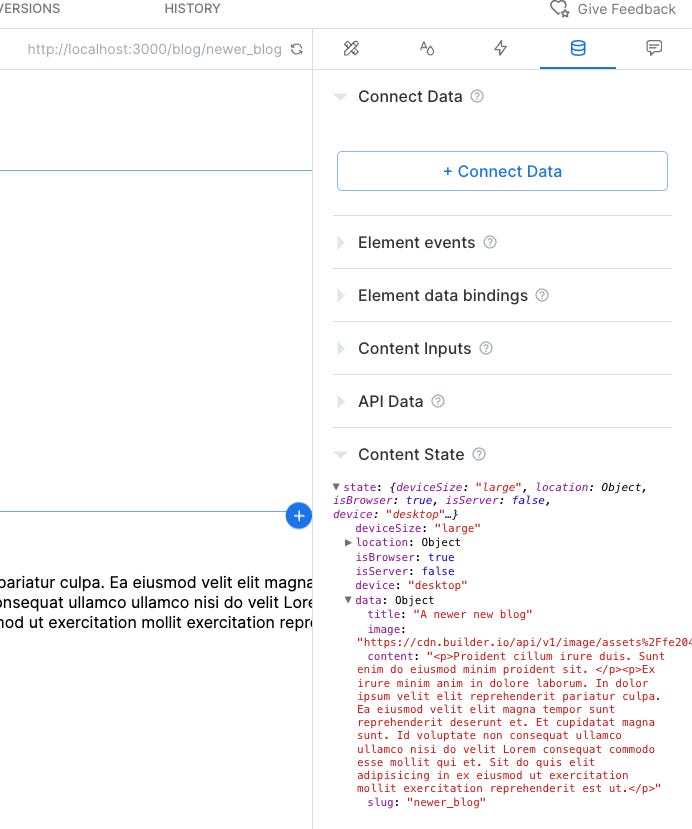
…Or is it?
Without any slugs, the API failed to get the correct data. We’ll talk about how to (partially) overcome this problem later. For now, just manually input any slugs from your blog data so that we can move on to the next step.

Step 3: Use the data
Insert a Text component into your page.
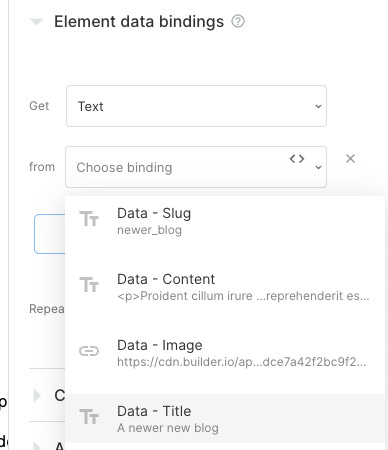
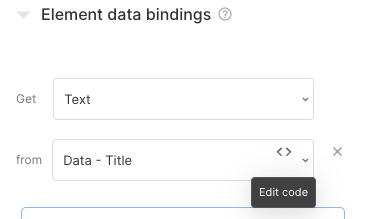
In the Data tab, create a new Element data binding.
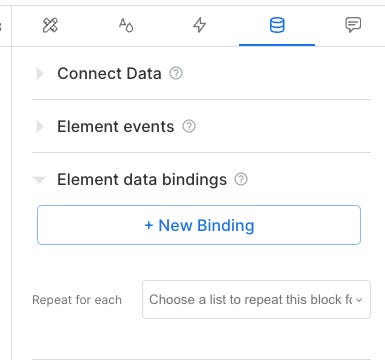
You should be able to choose from the data that was passed in from NextJS.
That’s it. You are connected. Try to change the slug to another blog post and see the data magically updated.
Step 4: Setting default values
To avoid having to manually change the slug values every time you want to author the page (otherwise the data can’t be fetched - no slug = no data), we can set the default values for the fields.
Go to the Element data bindings option, you should be able to edit the code behind the binding
Add an optional chaining (to avoid undefined error) and a default value for the field.

Close it. Now you can see the component even when there is no slug.
Closing thoughts
It’s unfortunate that a simple requirement like a reusable blog page is not supported on Buidler.IO, and although I achieved my purpose when I started on this journey, it still feels like a hack. I love Builder.IO’s capabilities, and hopefully, there are easier ways to implement this in the future :)